Making crochet earmuffs for the winter chill
Welcome to Part Three of my crochet earmuff tutorial! In Part One, I wrote about creating the crochet body, which the crochet petals are worked onto. In Part Two, I discussed how to go about making those petals. Part Three is about bringing it all together, to create a pair of crocheted floral earmuffs that will keep the winter chill outside of your head.
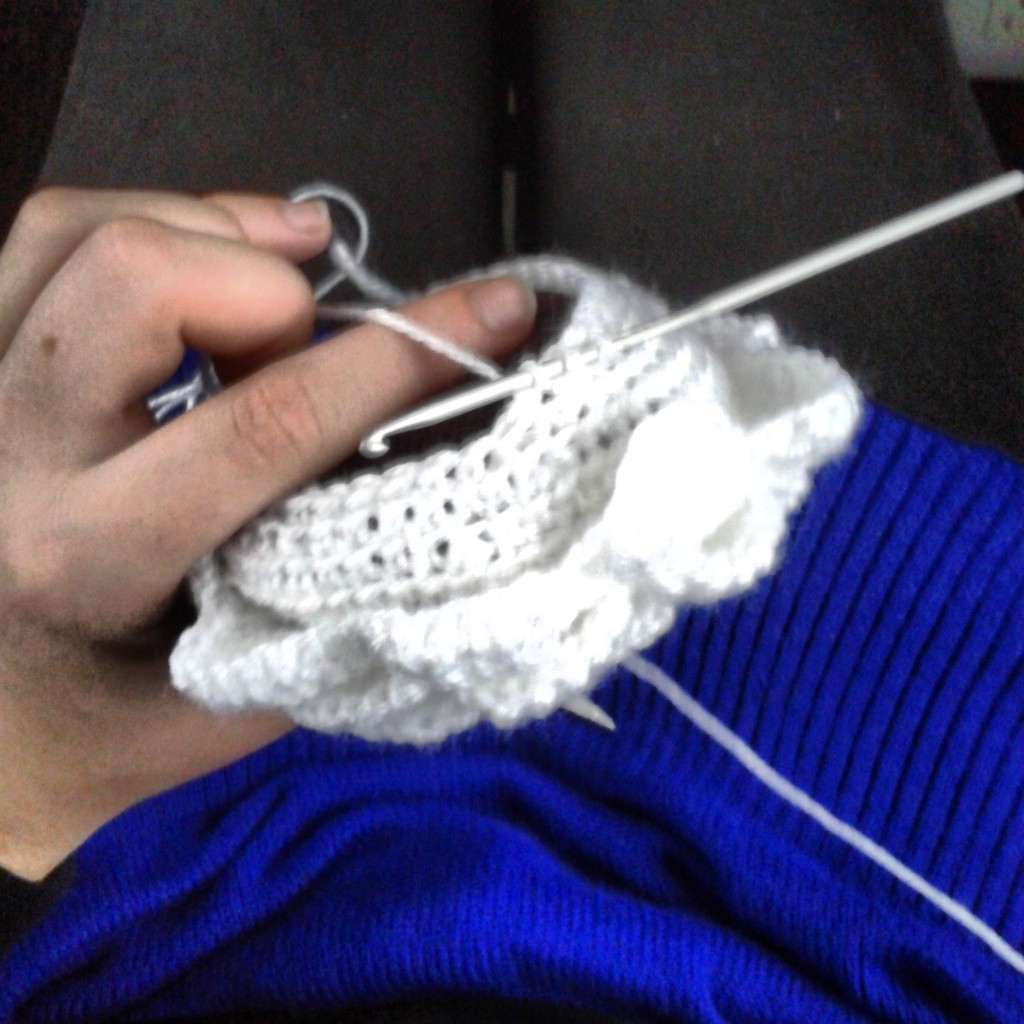
You should have something that looks like this currently:

And the back of the work should look like this, when the earmuff piece is inside it:

The stitch list
Chain stitch (ch)
Slip stitch (sl st)
Single crochet (sc)
Single crochet two together (sc2tog)
Double crochet (dc)
You will also need a large wool needle, and the plastic Alice band for the final sewing stage.
Finishing the earmuff
Add an earmuff piece to the inside of your crocheted piece. Cut the stockings so they resemble thigh highs, and roll them tightly into nylon doughnut shapes. Work one of these doughnuts into the inside of your crochet, as these will create a concave area that your ear will fit into while you are wearing your new earmuffs. Reattach wool to the original body of the earmuff, as you will now begin crocheting around the padding and nylon stocking.

1: 1 sc, 1 sc, 1 sc, 1 sc, *sc2tog, 1 sc, 1 sc, 1 sc, 1 sc, repeat from * until the end of the row.
2: 1 sc, 1 sc, 1 sc, *sc2tog, 1 sc, 1 sc, 1 sc, repeat from * until the end of the row.
3: 1 sc, 1 sc, *sc2tog, 1 sc, 1 sc, repeat from * until the end of the row.
4: 1 sc, *sc2tog, 1 sc, repeat from * until the end of the row.

5: 1 sc, *sc2tog, 1 sc, repeat from * until there is approximately 8mm gap left (approximately 3-5 stitches). Fasten off, cut thread with 10cm to spare, weave end thread through the last few stitches, pull tight to close the gap. Knot left of the wool and weave the end under the crochet body.

Repeat this pattern to create another earmuff flower. This is where the Alice band comes into play.
Crocheted Alice band strip for your earmuffs
You now need to crochet a band to cover the plastic Alice band.
1: Ch 31, turn the work. Skip 2 ch, work 1 dc into each of the stitches in the chain row.
2: Ch 2, work 1 dc into each of the stitches in the chain row.
3-5: Repeat row 2, finish off the work.
Wrap the crocheted strip you just created around the Alice band (fixed with safety pins if needed), thread your large wool needle with 30cm (12″) of the same wool you just used and sew up the crocheted piece around the Alice band.
Sew each end of the Alice band onto the earmuff pieces, and voilà! You should have a functional pair of earmuffs to wear while you are outside in winter.


Response
[…] How to crochet a pair of earmuffs (parts one, two and three) […]